well I have just dropped my eldest off at school for the day, thinking I could possibly get some crafting done but my youngest child Grayson has decided that is not to be the case today, typical!
So we are having a party at the weekend for my middle daughters 3rd birthday and we have two guest's who are too young for a party bag and prizes so I thought I would make something for them that is a little more age appropriate like a taggie blanket, which as all mum's know babies LOVE tags and best of all it can be used making left over fabric and ribbons from previous projects.
Ok so to get you started you will need:
- a sheet of felt
- two pieces of fabric
- lots of ribbons
- fabric scissors and tape measure
- sewing machine
I have chosen to personalize mine but it is totally up to you, I just think it gives it a nice touch. To do that I have taken two sheets of felt from hobby craft for 50p each ( the shiny one is 80p a sheet) and cut the letters out using card board stencils I drew. Then simply center at the bottom of the fabric, but not too close to the edge say 8cm away and hand sew it on the pieces you are about to cut with a co-coordinating thread.

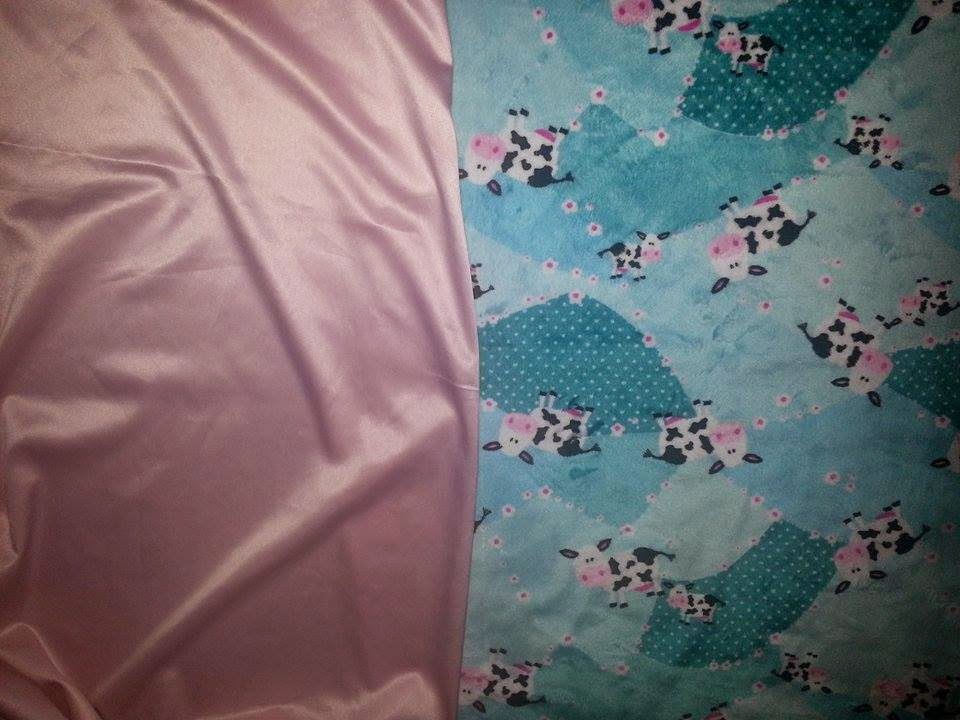
Now take your two pieces of fabric and cut them into two squares of the same size, I have done mine 35cm x 35cm this makes a nice size comforter. I have used a soft cow plush for the front found on Ebay for around £2 and a nice dusty pink silk for the back from Abakhans fabric store and around £5 a meter but you need no more than a fat quarter. Some people prefer using a dimple plush on the back but I prefer the two different textures together.
So your fabric is ready to go, you just need to cut your ribbons. They can be all the same length or all different sizes I have made mine quite long at 12cm each but this allows for stitching so they end up at 5cm folded. Now there are two ways to attach to ribbons to the fabric, I personally pin all my ribbons in place but you can add them as you go along with the machine. place your squares together, good sides together so you are looking at the bad side. fold your ribbon in half and place inside leaving the ends sticking out the edge of the fabric and pin in place ( leave room to sew) .
Sewing machine time! simply sew around the edges staying in line with your 1cm marker , do this all the way around insuring you leave a two inch gap at the end to turn it the right way and don't forget to lock you stitches at the begging at end by going back two stitches then forward two stitches
You are almost there, turn you blanket inside out so you have it all the right way out. now you just need to sew up the gap and probably placing a ribbon in there. The plush hides stitches well so I just do a running stitch and lock it in place but an invisible stitch is preferred If you were to sell It. Although please remember if you are to sell anything aimed at a child especially babies it MUST be CE tested!
Now simply cover your fabric with a towel or cotton and iron the edges to press them into place but please DO NOT iron the fabric without doing this as you risk burning it and having felt stuck to your iron and ruining your master piece!

YAY you are finished, now quick off you go and show it off to all who will look and don't forget to post me your pictures! Taggie blankets are extremely popular and they sell very well so if you are looking for something to add to your range or simply want to make as a gift this is a great project to create as there are so many different variations you can try, such as textures, sizes and shapes. I hope you all have fun making this Item and please feel free to comment for any advise all will be answered.

Now I am off to find my next project that I can show you all tomorrow. I am thinking Story book bunting which is brilliant for children's bedrooms and easy to make!
goodbye for now
with love from Victoria xx
No comments:
Post a Comment