Saturday, 24 January 2015

Embroidery storage hoop in under 10 minutes!

hey guys and gals,

As promised I will be showing you how to make a really quick storage hoop for your crafting space because if you are like me there is never a pen or scissors to hand when I need them as I am sure they just walk off. Now I have them in one place right in front of me ready for the next project.

Ok so you will need:

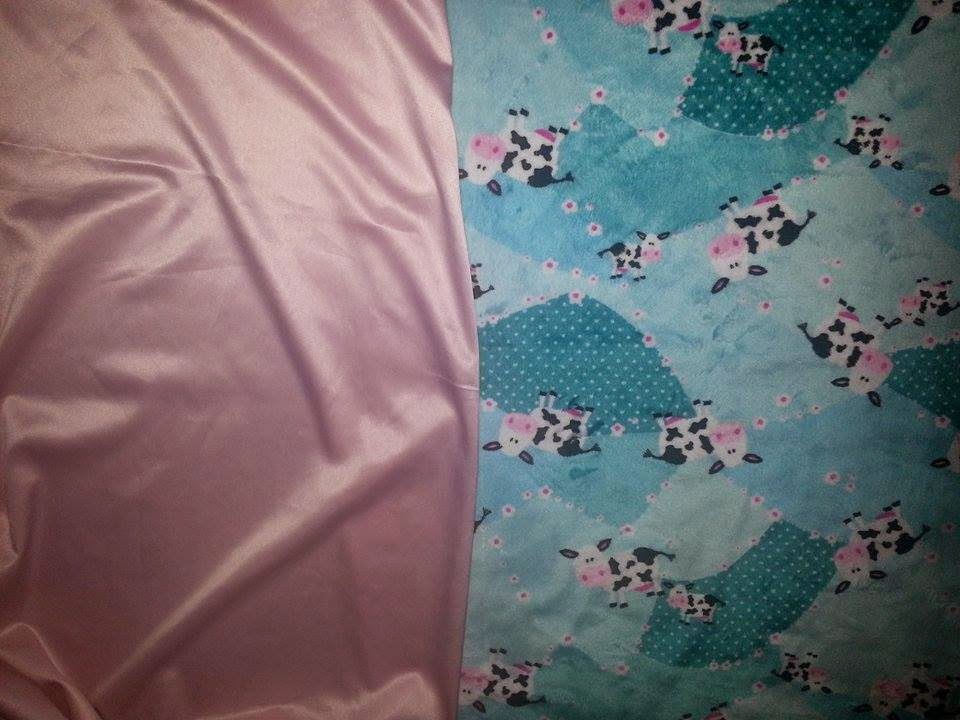
  • An embroidery hoop, mine is 10 inches from abakhans 
  • two pieces of fabric 
  • a machine isn't essential as you can do it by hand if you don't have one 
  • and bias binding ( optional)
lets get started! so first take your hoop and place it over your back choice fabric and draw around the hoop with 1cm edge. now place your second fabric on that piece and using your hoop decide where it needs to be and pin in place folding over a 2cm seam at the top.


Now quickly iron your fabric concentrating on the seam edge. remove the two pins near the seam and this should allow you to fold the fabric to allow you to sew the seam. I added bias binding to the seam at the same  time for a nice finish. Now sew around the circle edge to attach your two pieces together.
quickly iron again, then take your embroidery hoop apart like so.
now place your piece of fabric over the inside hoop and press the outer ring over it. This can be a little tricky I use my whole arm :) 
Once you have done this turn it over and pull the edges of the fabric nice and tight so the fabric is all smoothed out. a trim if need be but not too close, you will want to be able to pull it again if it ever loosens. 
And you are done! place all your bits and bobs inside and hang on your wall.
How easy was that? you could add these to a child's play room or even your kitchen or how about using waterproof fabric for your bathroom, the possibilities are endless! 

I also said I would show you some of my own embroidery hoop projects, I am a little bit of a geek so they all follow that theme :) I have done a DR Who TARDIS hoop with a fantastic space fabric as the backing and felt decoration.
 I did a gorgeous jiggly puff hoop from the program pokemon! Using only felt for this one.
My next one was a Teenage Mutant Ninja  Turtle this is entirely felt but the knot is reinforced with a cardboard piece inside.
The last one I have to show you is a mix of two favorite things of mine, the Wolverine and Minions and i think it worked pretty well !


Hoop art is so addictive as there are so many things you could do and they are really simple to do , some of mine have taken hours but that is because they are a little more complex than normal. You can really have fun with these I suggest you give it a go!  

I shall be back soon, Victoria xx

Friday, 23 January 2015

craft heaven! aka abakhans

hello!

Today I haven't had the time to craft but the day hasn't been a total loss I got to visit heaven on earth! If you have an abakhans fabric and craft shop near you , then you will know what I mean and if you don't it is worth the travel time or they even have a website www.abakhan.co.uk but go armed with a good size bank balance because it will be crying by the end of your trip, everything is such good value that you just want to buy it all!

I only visited for a few meters of bias binding for bunting I now I have to make this weekend and guess what that is not just what I left with.
I now have over 50 meters of bias binding in a wide range of beautiful coloured satin's at 30p a meter, although the price tag said 20p :( but it was an essential buy as you never know when you will need it!

I got two beautiful embroidery hoops, one is 10 inches for a project I will be showing you all tomorrow and one is 6 inches. I prefer these hoops rather than the box standard ones as they are more decorative and actually cheaper! large was £2.65 and the smaller one was £1.65 which is a complete bargain for the beautiful things I will be turning them into. I shall give you a sneak peek at some hoops I have done previously in the next blog.

Now best off all I got more fabric for my hoard, I have so much I don't know what to do with it I just buy it because its pretty lol but most of today's stash will be for skirts for my kiddies and I got a fantastic teal velvet for a 50's swing dress for the new rockabilly range i am working on right now! which was only £5 a meter give or take as it was basket weight.

I got this lovely dark pink seahorse print cotton fabric as my daughter is obsessed with the ocean and it was a bargain at £3.84 a meter.
This fantastic vintage inspired fabric which is very popular was around £4.50 a meter

this bright green polka dot fabric was the steal of the day at £2.20 a meter!
And the beautiful fox cotton fabric was £4.50 a meter and i believe it came in 3 colour variations but this one was my favorite design.
This store literally has all you could need for most craft projects like cross stitch, knitting, crochet, jewelry making, sewing , painting , card making the list is endless. The ques and cutting time can sometimes be a little relentless so you will often find a group of lost husbands and partners waiting for their other half's to return , this can often take hours and you won't even notice the time fly!

If you visit , let me know what your best buy was :D see you tomorrow with some embroidery hoop fun!

victoria xx

Thursday, 22 January 2015

Jelly fish fields, AHOY!

I am sorry have been absent for a while my middle daughter Esmay-Elora has been busy turning the big 3! Time actually does fly way to quickly but for me it is lasting a little longer because she will be passing for two at all the attractions for at least another year, she is just so small and cute!

She had this crazy birthday party with lots of children hyped up on sugar! I blame the krabby pattie cupcakes they were a diabetics worst nightmare! As you may have guessed from the cupcakes, her chosen theme was spongebob square pants, so she isn't the typical girly girl but it was lots of fun to decorate.


Esmay loves the fact that spongebob goes jelly fishing in jelly fish fields so I figured we would have ago at making  one, it actually turned out really nice and was a great talking point. I even have a way for you to turn it into a fun party game, I just didn't have that much time although each jelly fish only took about 4 minutes!

So as always here is what you shall require!

  • pink felt and lots of it! 
  • scissors and sewing machine 
  • pink balloon ribbon ( although if you want them to last longer than the party I  recommend thin ribbon) 
  • toy stuffing
  • if you want to make it a game you will need velcro dots and 1cm pink ribbon i will explaint his bit at the end
Now draw a cardboard template of the jelly fish body, Google spongebob jelly fish for reference if need be I did as the shape is different. Once this is done pin it too the felt and cut around it twice for each jelly fish.

now take your two pieces to the sewing machine, cut a long piece of balloon ribbon to hang it and around 6 others for the tentacles. start from the side of your jelly fish and sew around the edge and add your hanging ribbon as you go. once you get to the bottom place your tentacles in place and sew over them. now stop and stuff your jelly fish slightly then carry on sewing until you reach the end and you are done. How easy was that ?! 

so to turn this into a game simply attach a Velcro dot where the hanging ribbon should be and attach the other Velcro dot to your 1cm ribbon then place them both together and hang, now if you give the children small fishing nets they will be able to bash them off and see who catches the most in their nets to win! hours of fun for very little money, in fact all I used was scraps and things I already had in my craft draws. 

Well I am rather sorry this blog is a short type and run but my 8 month old Grayson is teething now his two front teeth are cutting the surface and as all mothers can imagine, that's one very un-settled baby boy right now and nothing is working to ease his pain :( 

goodbye for now 
victoria x

Thursday, 15 January 2015

how to make a child's cushion cover with front pocket

good morning everyone,

My other not so clever half woke me an hour early today and told me it was 8am, so my children have been ready for school for the past hour giving me time to share another project with you as we have a rather busy day today with my sister visiting and taking our puppy for a well needed pamper! . Every cloud and all that! so last night I started a few projects and ended up cutting out dozens of felt jelly fish, for decorations at our spongebob party this weekend but i will share those with you in my next blog.

My other project was a child's cushion with front button pocket and this is what I will be sharing with you today. Children love these as they can hide all their secret things inside and can be done with fabric of their favorite characters, my daughter has a Frozen pillow and the other has the prettiest unicorn fabric!

for this project you will need:

  • half a meter of fabric ( main colour)  
  • fat quarter of fabric (pocket choice)
  • a big button 
  • 2 sheets of felt (optional)
  • fabric scissor and your machine 
Lets get started, my cushion case is to fit a 16x16 cushion insert. adjust yours accordingly. Take your half a meter of fabric and cut two identical squares 16 inches long and wide and check them against each other to check. Now take your fat quarter and cut a rectangle at 10 inches long and 16 inches wide.
Take your rectangle and fold a 1 inch seam at the top ( to allow room for button hole) and sew in place. now for the tricky bit for some, its the button hole. My machine has a one step button hole feature, yours might have a four step button hole feature I find these a nightmare but that's just me. If you can't manage the button hole I have previously used Velcro instead and sewn the button to the front to give the same effect . Once your button hole is in place use the seam ripper to open it up it will be a little frayed, don't worry this wears away in time.
Now take one of your squares and make a 2cm seam at the bottom and sew it in place ( this allows a gap to enable you to turn your pocket back and insert the cushion without the need for zips) . Once that is done take your rectangle pocket and place it on top of the square you just adjusted and pin together leaving the gap at the bottom like so.
sew both sides together to create one square equal to the other. Do not sew the bottom only the sides. now sew on your button on the red fabric just under the button hole making sure the button can get through. I have added a name with the felt but this is optional I used the machine for this but I always hand sew them in usually.
So now you have two equal squares, you just need to turn them right side to right side and sew ALL the way around the edge following your 1cm marker. you are then able to turn it inside out and pull the pocket round the right way and iron. Don't forget you can not iron felt so cover with a piece of fabric first. Then turn your pocket back the wrong way and insert the cushion then flip it back and you are all done.
It may seem quite fiddly at first but with a bit of practice they are really easy to do, and they sell really well too. They are really handy for travelling with as well, we took ours on holiday with us and they used them to sleep on the ferry and in the car and they put the toys in that they wanted on board.

So I can't decide on my next project but I know I am teaching cushion covers and fabric bunting tomorrow so I will probably incorporate that at some point and i will show you all my fab little jelly fish decorations :)

See you soon
love always Victoria xx

Wednesday, 14 January 2015

how to make story book bunting in under 30 minutes!

hey guys!

So today we are going to learn how to make storybook bunting. I love this project, it is so easy and quick to do and it goes great in your child's bedroom or playroom or even the classroom the possibilities are endless , as  are the amount of different stories you can use to do this. It can even be adapted for adults by using pages of their favorite books although they might not be as bright, they will still be effective!

So I have decided to use my all time favorite Disney story for this project and it is Beauty and the Beast. I find books with glossy thick pages work and look the best, old annuals are great for this! To complete this project you will need:

  • 2 meters of bias binding 
  • a story book of choice
  • scissors 
  • pencil 
  • sewing machine
  • triangle template 15cm across and 15cm down


Once you have selected your book go through it with your triangle template and use it to draw around the pictures you would like to  use. I usually stick to the story order so that the bunting tells the story but this is entirely up to your personal preference. 
Once you have drawn all your triangles, cut them out and place them in order like so. 
Now take your Bias binding and fold over one end to form a loop and run it under your sewing machine , back and forth to lock it in to place like this.
Now go to your machine and fold the binding down the middle and place under the foot in line with where the needle must start. lock the thread into place and carry on for approximately 4 stitches.Now place your first triangle piece in between the folded binding without lifting your pressure foot and continue to sew until the end of the triangle and then place in your next piece, the length of the pressure foot will create the little gap you need.
Do this until all you pieces are sewn in and make sure they are all the right way up or you will kick your self at the end, I have been there I know haha now cut the binding leaving enough length for a loop and do as you did at the beginning and lock it into place using your machine and you are done!
 How easy was that? I did mine in only 15 minutes which is a nice change for my other projects that often take hours! Don't forget if you intend on adding these to your own range to sell please check copyright issues with the particular book you choose as I know Disney can not be sold without a license  and I would hate for anyone to run into trouble, but if it is for personal use or a gift then these laws don't affect you :)

Well that was fun but now I am moving onto a project a little more time consuming but it is always worth it in the end! coming up we have cushion covers and girls skirts for you to create

goodbye for now
with love from Victoria xx
 

How to make an adorable Taggie blanket

good morning,
well I have just dropped my eldest off at school for the day, thinking I could possibly get some crafting done but my youngest child Grayson has decided that is not to be the case today, typical!
So we are having a party at the weekend for my middle daughters 3rd birthday and we have two guest's who are too young for a party bag and prizes so I thought I would make something for them that is a little more age appropriate like a taggie blanket, which as all mum's know babies LOVE tags and best of all it can be used making left over fabric and ribbons from previous projects.

Ok so to get you started you will need:

  • a sheet of felt
  • two pieces of fabric 
  • lots of ribbons 
  • fabric scissors  and tape measure
  • sewing machine
I have chosen to personalize mine but it is totally up to you, I just think it gives it a nice touch. To do that I have taken two sheets of felt from hobby craft for 50p each ( the shiny one is 80p a sheet) and cut the letters out using card board stencils I drew. Then simply center at the bottom of the fabric, but not too close to the edge say 8cm away and hand sew it on the pieces you are about to cut with a co-coordinating thread. 

Now take your two pieces of fabric and cut them into two squares of the same size, I have done mine 35cm x 35cm this makes a nice size comforter. I have used a soft cow plush for the front found on Ebay for around £2 and a nice dusty pink silk for the back from Abakhans fabric store and around £5 a meter but you need no more than a fat quarter. Some people prefer using a dimple plush on the back but I prefer the two different textures together.

So your fabric is ready to go, you just need to cut your ribbons. They can be all the same length or all different sizes I have made mine quite long at 12cm each but this allows for stitching so they end up at 5cm folded. Now there are two ways to attach to ribbons to the fabric, I personally pin all my ribbons in place but you can add them as you go along with the machine. place your squares together, good sides together so you are looking at the bad side. fold your ribbon in half and place inside leaving the ends sticking out the edge of the fabric and pin in place ( leave room to sew) .

Sewing machine time! simply sew around the edges staying in line with your 1cm marker , do this all the way around insuring you leave a two inch gap at the end to turn it the right way and don't forget to lock you stitches at the begging at end by going back two stitches then forward two stitches

You are almost there, turn you blanket inside out so you have it all the right way out. now you just need to sew up the gap and probably placing a ribbon in there. The plush hides stitches well so I just do a running stitch and lock it in place but an invisible stitch is preferred If you were to sell It. Although please remember if you are to sell anything aimed at a child especially babies it MUST be CE tested! 

Now simply cover your fabric with a towel or cotton and iron the edges to press them into place but please DO NOT iron the fabric without doing this as you risk burning it and having felt stuck to your iron and ruining your master piece!


YAY you are finished, now quick off you go and show it off to all who will look and don't forget to post me your pictures! Taggie blankets are extremely popular and they sell very well so if you are looking for something to add to your range or simply want to make as a gift this is a great project to create as there are so many different variations you can try, such as textures, sizes and shapes. I hope you all have fun making this Item and please feel free to comment for any advise all will be answered. 

Now I am off to find my next project that I can show you all tomorrow. I am thinking Story book bunting which is brilliant for children's bedrooms and easy to make!

goodbye for now 
with love from Victoria xx

Tuesday, 13 January 2015

a little intro to my blog with husqvarna E20 review

Hello everyone,
         I will begin by introducing myself before we go any further. My name is Victoria , i am 23 and I am a mother to 3 beautifully evil children under 5!
I absolutely love crafting ( I imagine that is why I am still sane) although my main craft is sewing I do try lots of other crafts when i get inspired to do so. I have spent the last year running a page on Facebook selling my crafts, but this year I have decided it is time for a change so I can inject the fun back into crafting for my self.

As i am sure many others can relate too at some point in life, when you HAVE to do something rather than WANT to do something, it becomes stressful and you can loose all the passion you once had and it becomes a chore. Well that is where I am at now, I have gone from a point where crafting bought me so much joy, to a point where i would rather do any thing but orders (yes even the housework)! so this year my time will be spent teaching others my skills and sharing my projects with you all .In just a few weeks of closing my order books I have already caught the crafting bug again and I can tell it is going to be a great year!

So now that i have introduced myself I thought I would tell you all about new my sewing machine, which is a vital piece of equipment for me, I actually don't know how I would cope without it! plus it is used in the majority of my crafts, so you will know which one i am using and why i highly recommend it to crafter's of all abilities, so yes if you don't own one this is the one you should invest in.
I started off with the Ikea sewing machine which was awful and destroyed nearly every item I set out to create, so if you pass it and think wow that's a good deal,just keep walking!  but that all changed when Christmas came around and I received the best machine I have ever come across!

I now have the Husqvarna H class E20 sewing machine and let me tell you it is pure heaven and at £159 it is a bargain. Even more so when it came with a fabulous free gift from GUR sewing machines on amazon, containing a good quality stylish carry case, 3 pairs of scissors, 50 threads (although not the best quality), 20 needles, bobbin box, tape measure and pearl head pins. What more could you need? well how about all the extra's that come with the machine such as 6 different foot attachments, needles, bobbins and a seem guide.
The machines has 32 practical and fun stitches to play around with, although i rarely use more that 5 of them, it is nice to have them. unlike some machines it is very easy to change the settings and it comes already set out for most tasks that would be very beneficial to a beginner but the easy guide tells you all you need to know.
when I was searching for a machine I was looking for one essential feature and it was the one step button hole function which I find is an absolute god send, the machine does this with no problem and will do any hole to the size of your button , it is pure genius!
I started out by filling up my bobbins which I found was easier than other machine as you don't have to remember to pull the manual arm out and stops automatically when the bobbin is full.It is easy to thread and has a built in needle threader should you need it.
Now as soon as you press your foot down on the pedal, that is when the magic happens. It runs so smoothly and pulls the fabric through nicely, allowing you to sew straight,fast and neatly whereas some machines tend to drag your fabric off in another direction.
so far with this machine i have completed many tasks such as cushion covers, bunting, skirts and blankets and I am yet to encounter a problem, compared to much more expensive machines i have used whilst on courses I find this one far more effective and better value for money.

So now you know what machine I am using I can begin sharing my step by step guides to my projects with you all, along with reviews of the items I use and just the general life of a crafter. If there is something you would like to see made get in touch and I will feature it :D

Thanks for reading I hope i haven't bored you too much
see you soon!

Victoria xx